Yesterday and today I got to work on my low bench. I’m at the point where I need to finish making the legs and needed to figure out how to drill and taper the holes for the legs.
I have no experience picking the right angle for these legs. They need to angle out both front-to-back and side-to-side. This will help the bench be more stable and less likely to tip over. But you don’t want the legs to be angled so far that weight on the bench could cause the legs to snap, and don’t want the legs sticking out so far you could trip over them. You also don’t want them to be so vertical the bench is ‘tippy’.
Chair makers talk about the angle of legs in terms of their ‘rake’ and ‘splay’, where rake is the amount the leg angles front-to-back and splay is the amount the leg angles side-to-side. Peter Galbert describes it well in an older blog post about drawing chair designs. He has a nice drawing showing rake and splay:

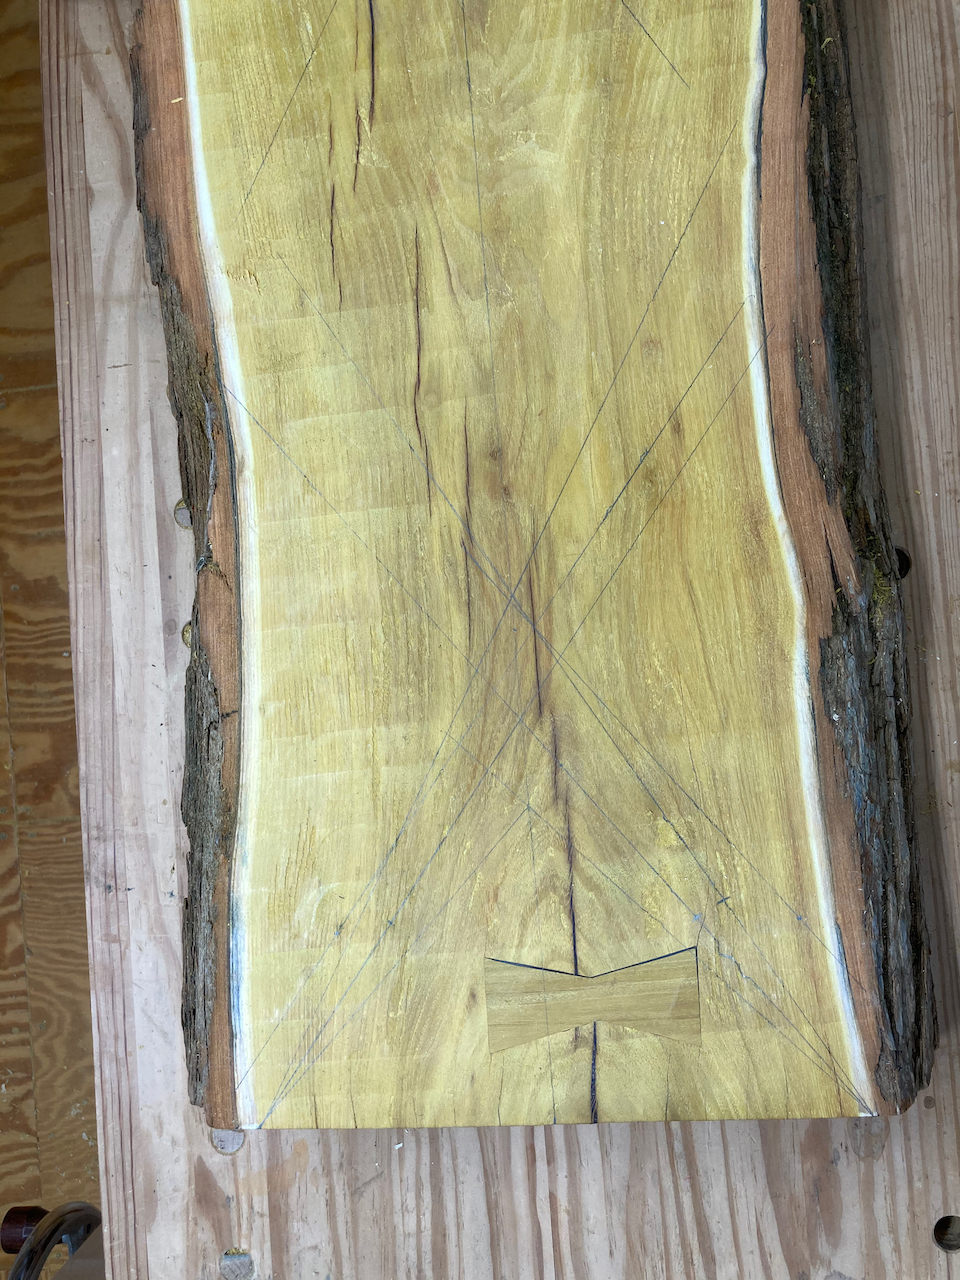
That’s all well and good, but ultimately you have to have a particular angle at a particular orientation to drill the hole for the leg. And with no knowledge on how to figure them out, I decided to go with the ‘organic’ approach. I started exploring options. I tried more than a few ideas, as you can see from all the lines on one end of the bottom of the low bench slab:
Eventually I found a location and angle I thought would work, but I realized I needed to make a mock up to check what I was doing. So I found a chunk of poplar left over from making a bending form for a fan back side chair comb. It was almost as thick as the slab, so I started experimenting with making a tapered hole.
Tapered holes are good because they allow the weight of a chair or bench and things on top of them to push the leg more tightly into the hole, helping to keep it from getting loose. But I’d never made a tapered hole of any size before, and these will be more than 3 1/2" deep. The basic process is normally pretty simple: drill a hole at the appropriate angle a bit smaller than the smallest diameter then use a taper reamer to make the hole taper from wider to narrower. You can make a reamer or buy one from someone like Tim Manney or Elia Bizzarri. Here’s an example of one of Elia’s (the kind I have):

I did a few experiments, and discovered along the way that my reamer needed sharpening. Thanks to a great video from Curtis Buchanan it only took me about ten minutes to sharpen mine, which made a huge difference.
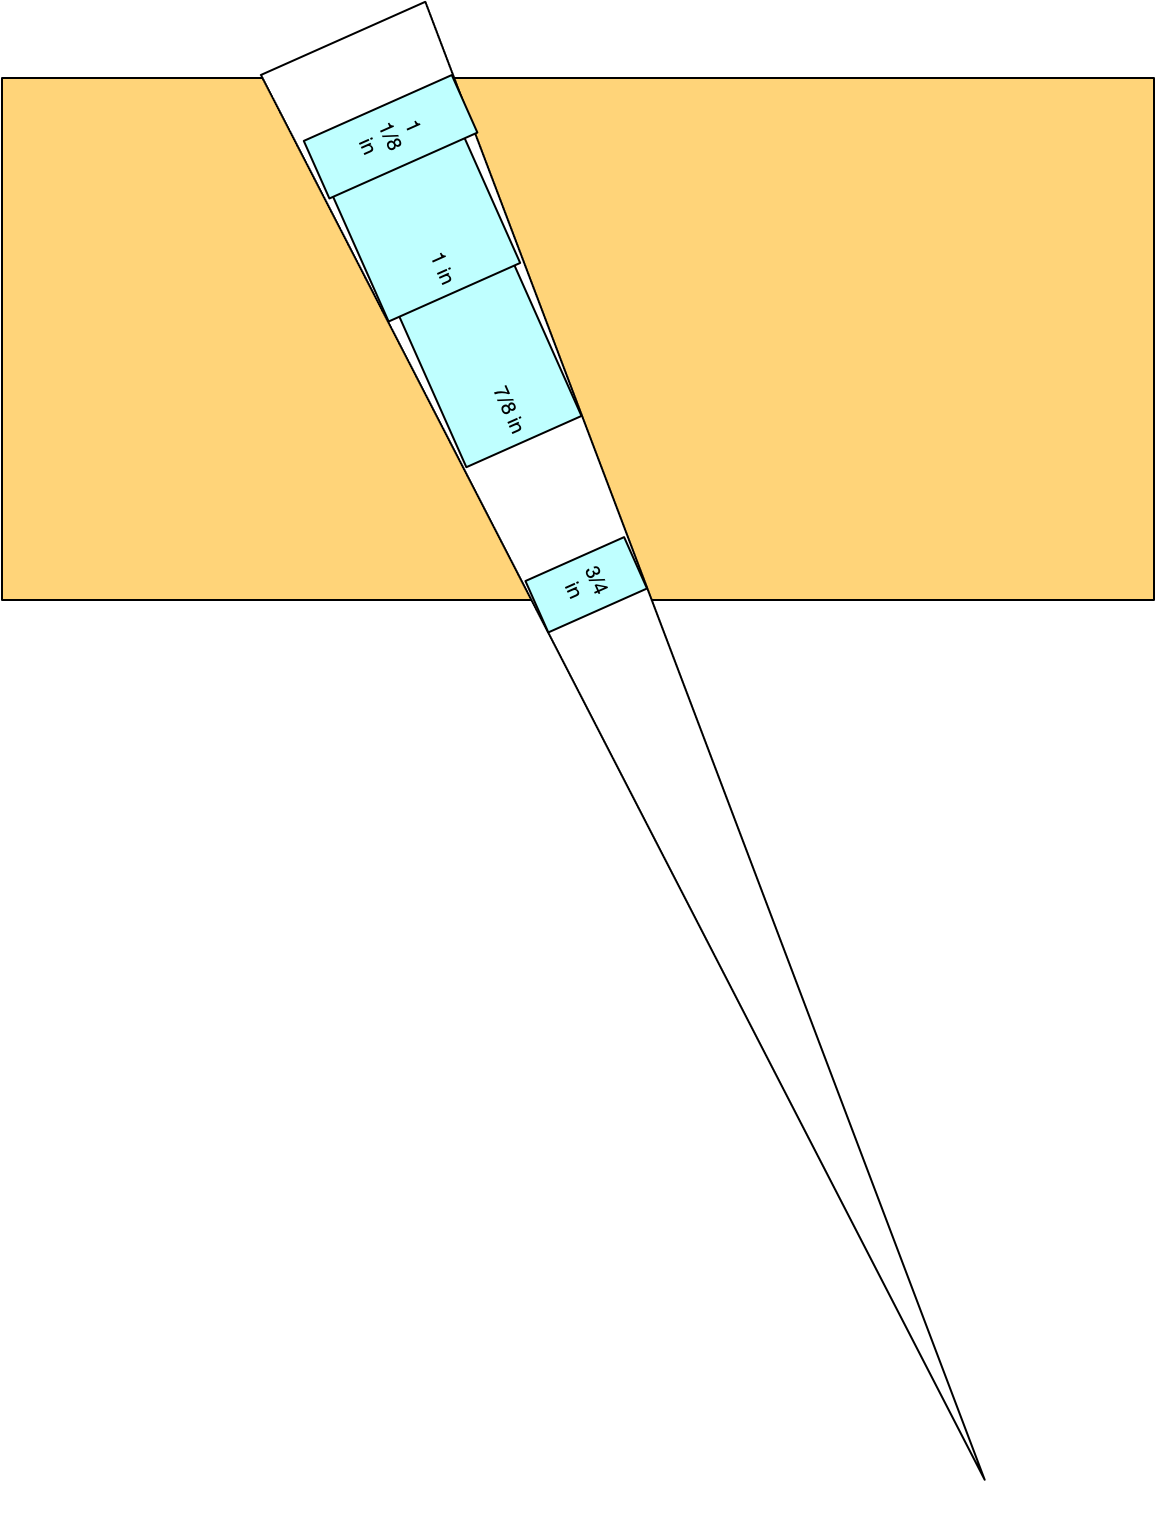
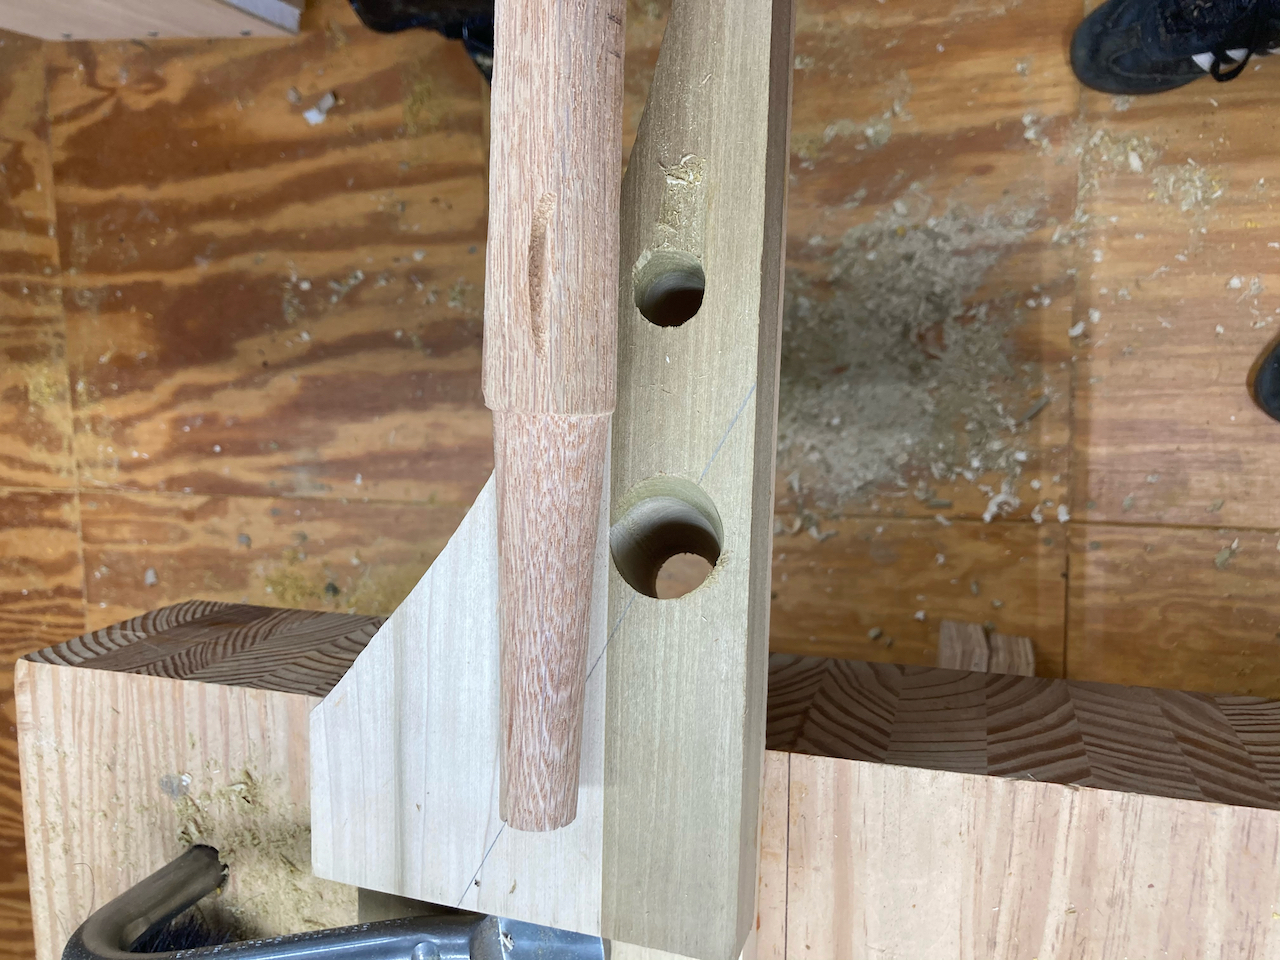
I also discovered there’s a lot of material to remove when reaming a hole more than 3 1/2" deep. So I cheated. I made a drawing of the hole produced and figured out how to drill a stepped hole starting from larger diameters to smaller ones, to reduce the amount of material to remove while reaming.
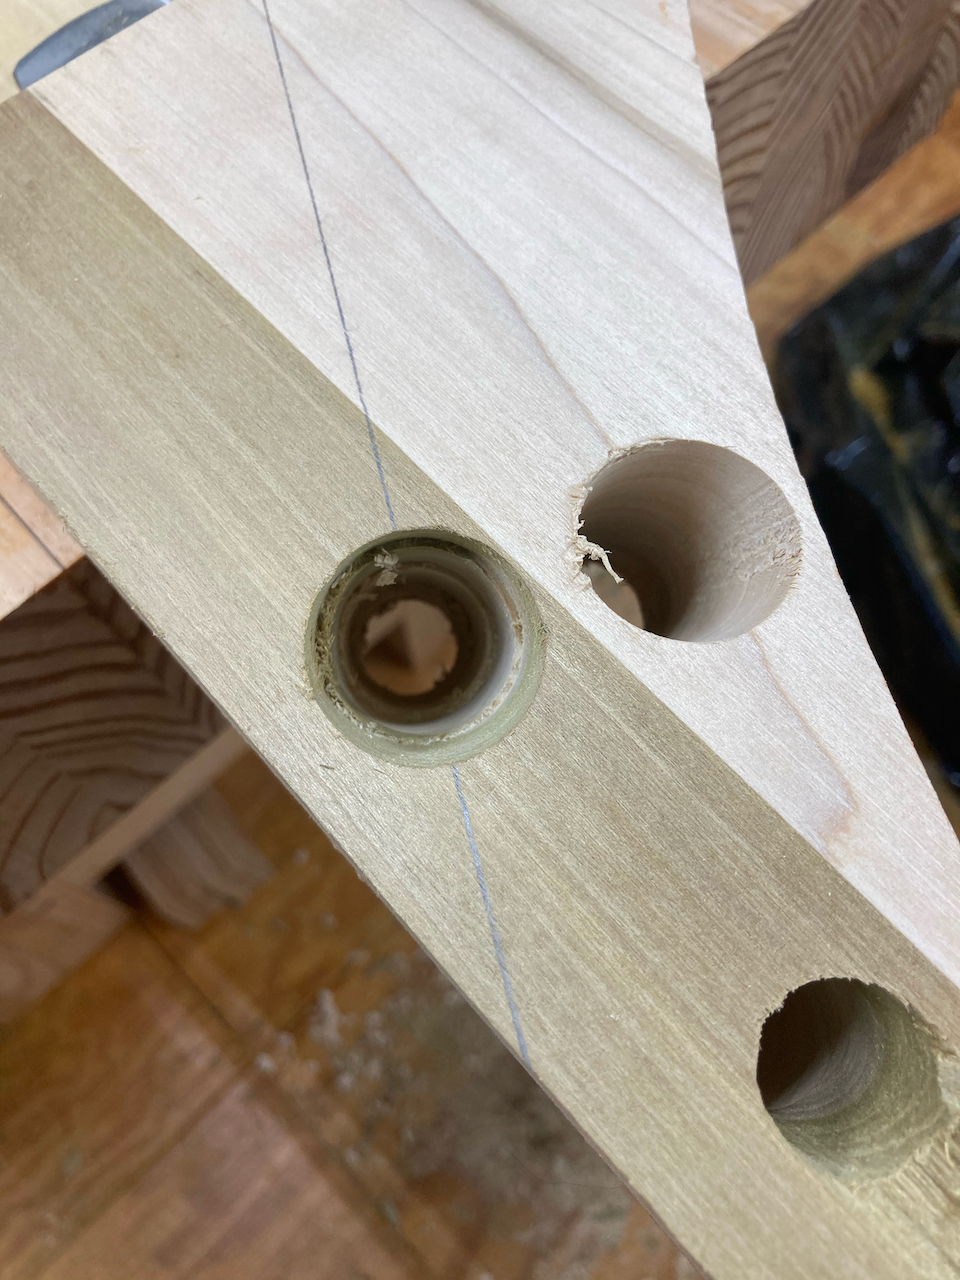
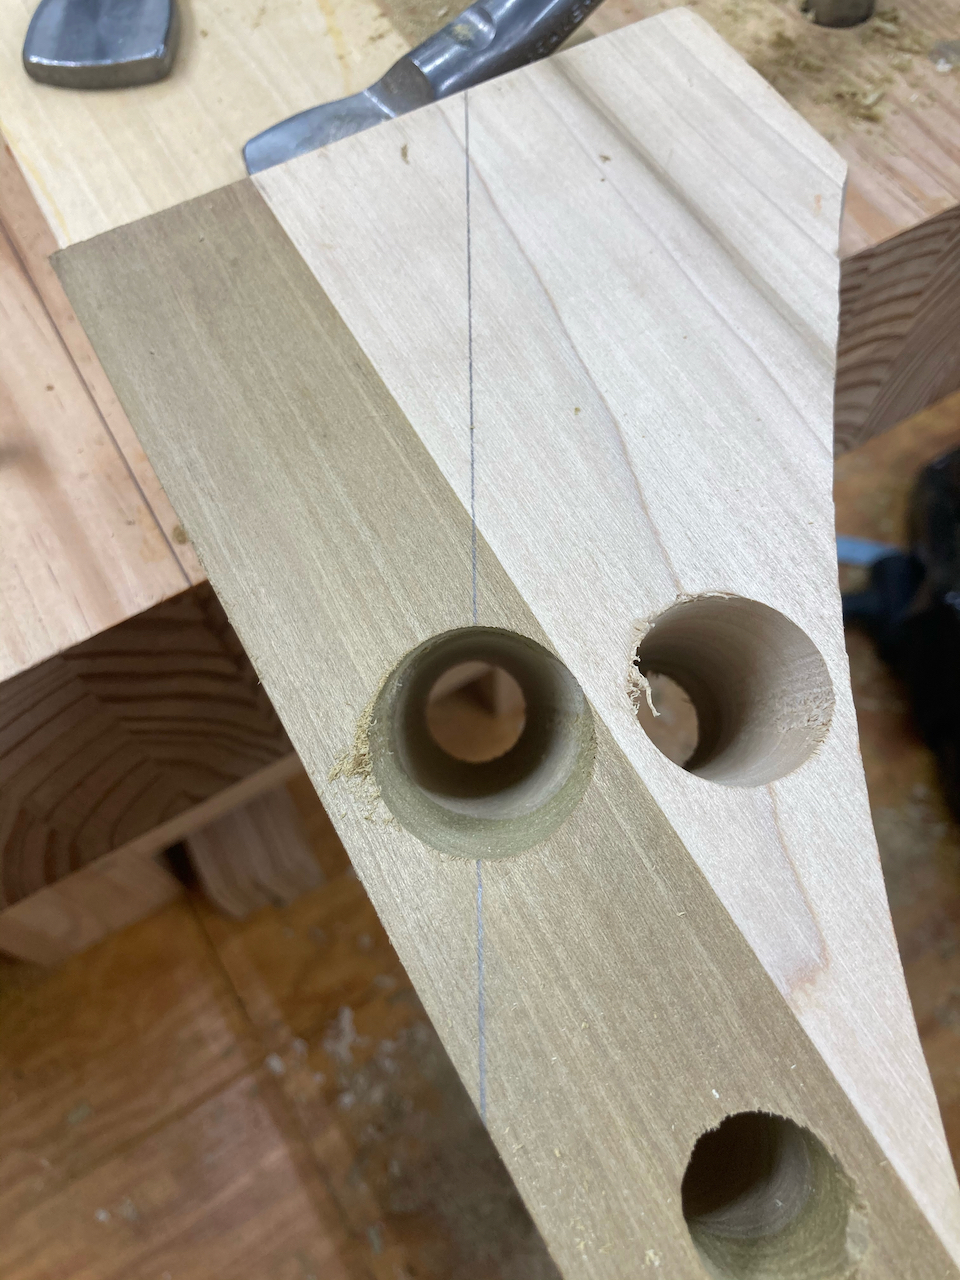
Happily, stepped drilling worked the first time (on my third try making a hole, as you can see).
I made a test ‘leg’ from a failed fan back chair post I had sitting around. Tapering the ‘leg’ at 6º is a lot harder than the experts make it look, but I got it done. While the ‘leg’ is a smaller diameter than the bench leg will be, it was enough to get a sense of where the leg will be.
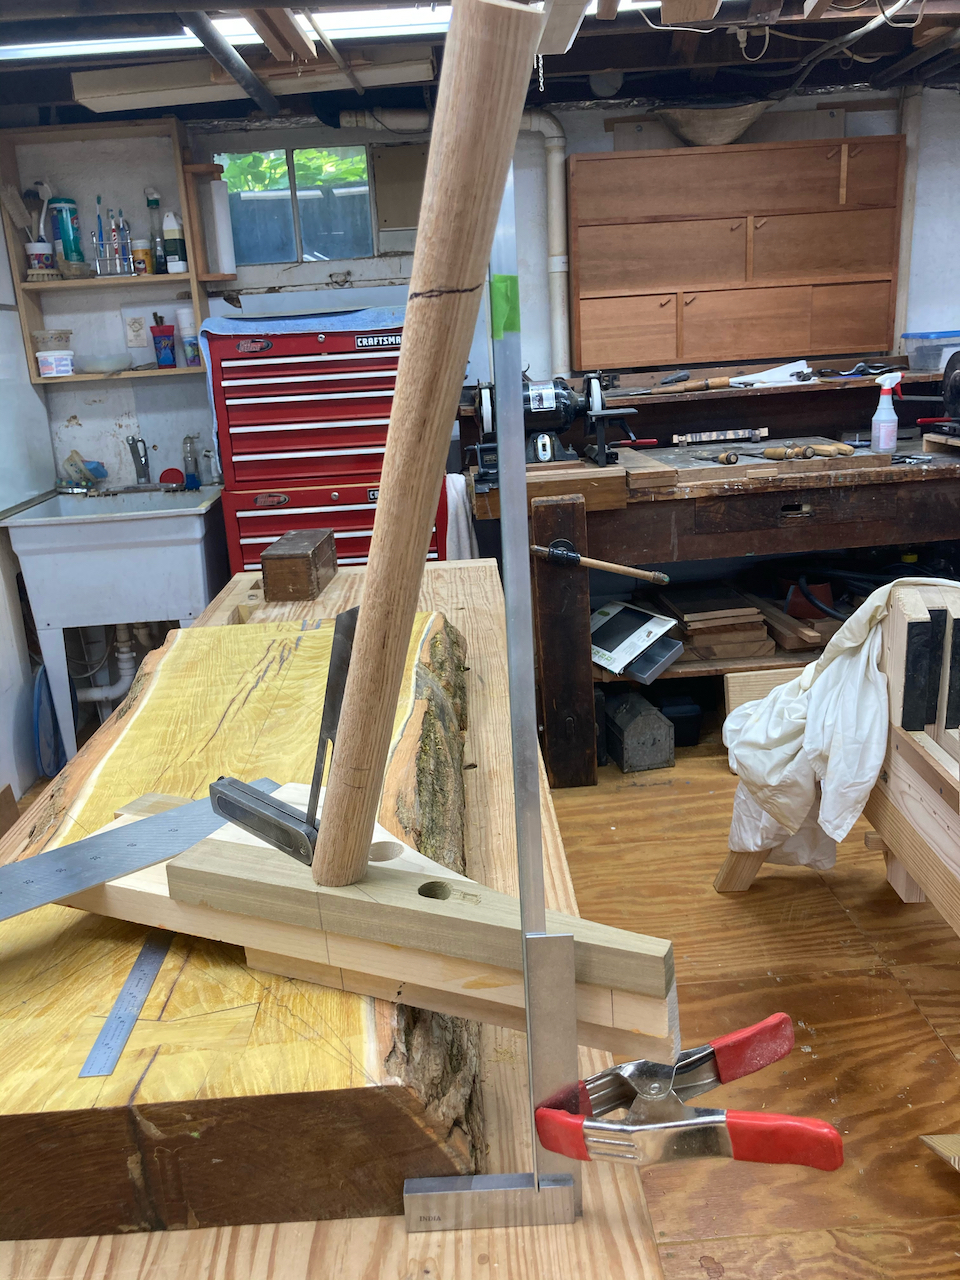
With the test leg in the test hole set atop the slab at the appropriate orientation, I could see the rake it will have.
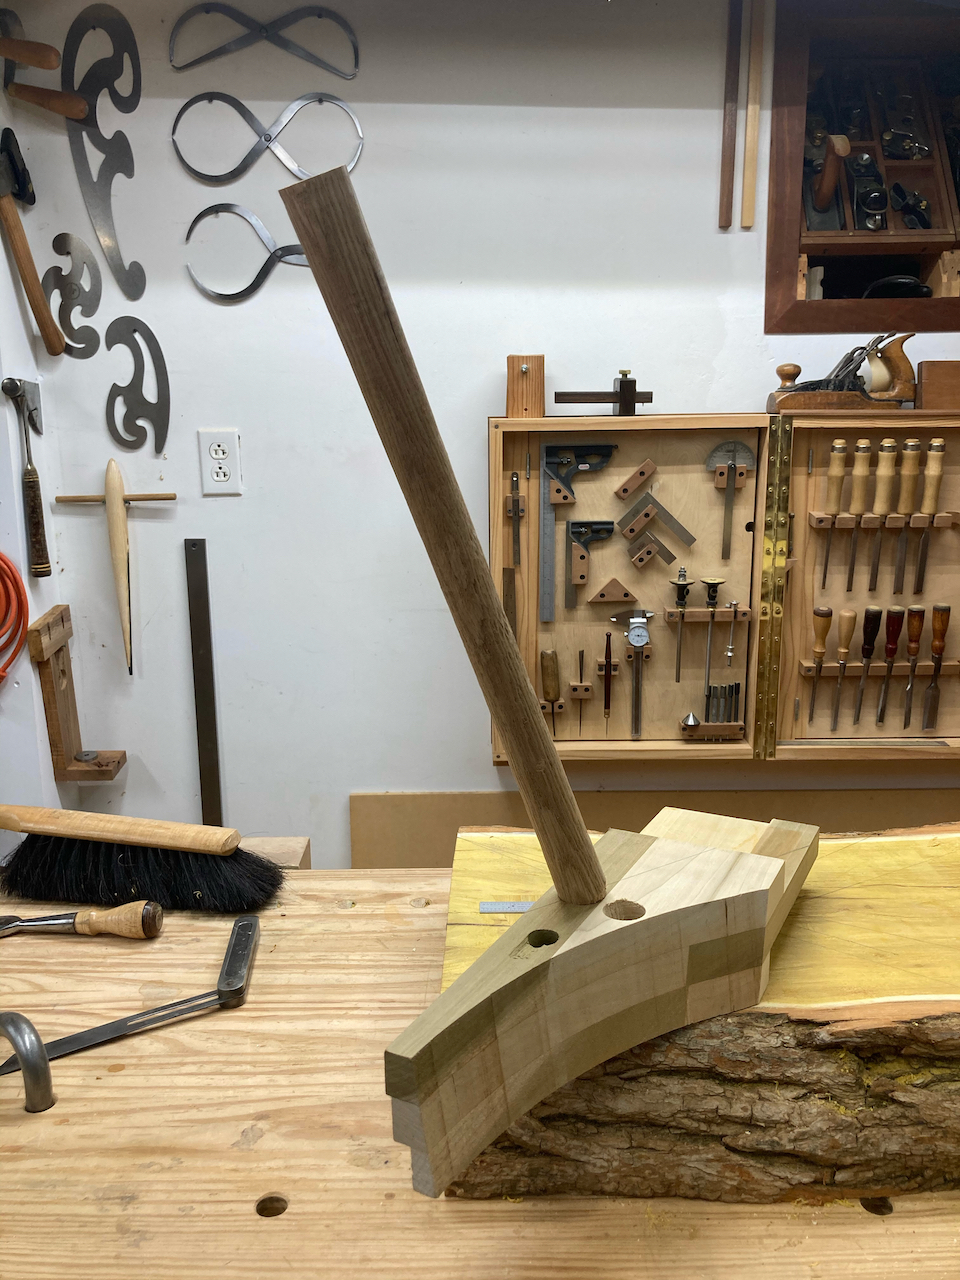
And also the splay.
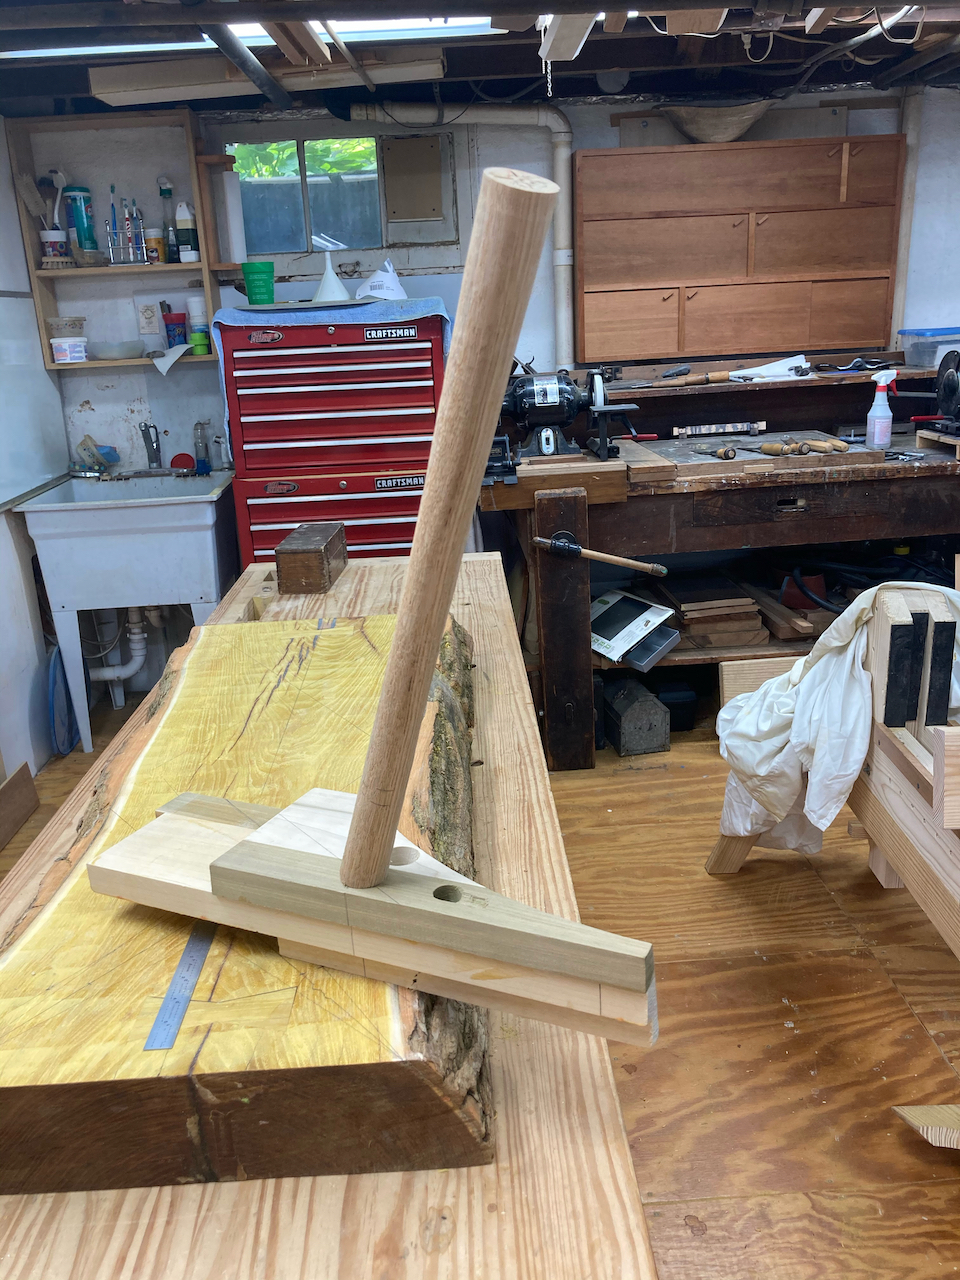
I used another cobbled together jig to figure out approximately where the leg will hit the floor to get a sense of how far out from the bench the leg will project.
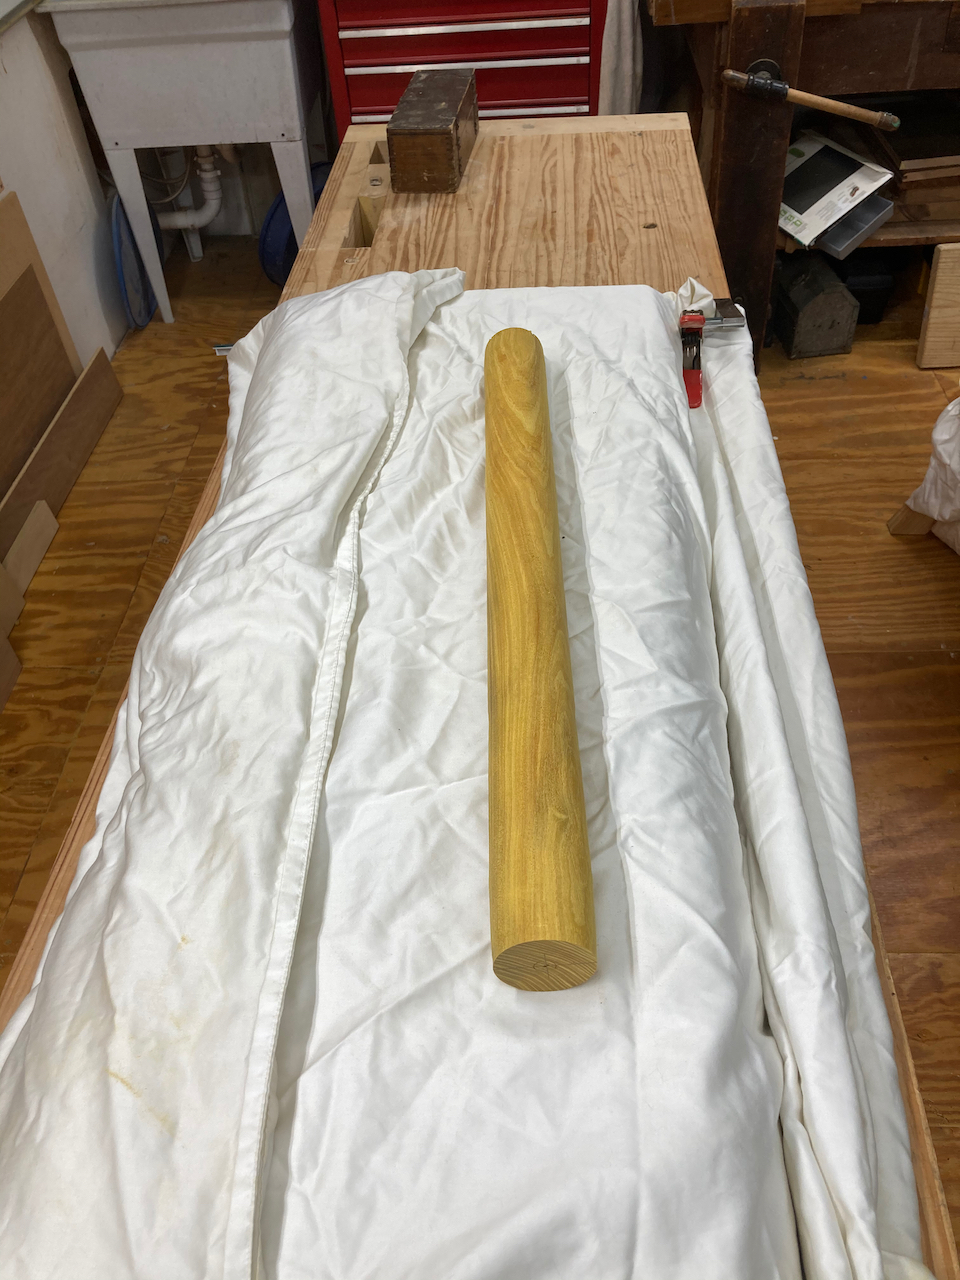
I also took some time to make the blank for a leg for the bench. From making the first two legs, I learned that taking off excess material before mounting to the lathe matters, especially for dense woods like Osage Orange. I made my blank square in cross section first.
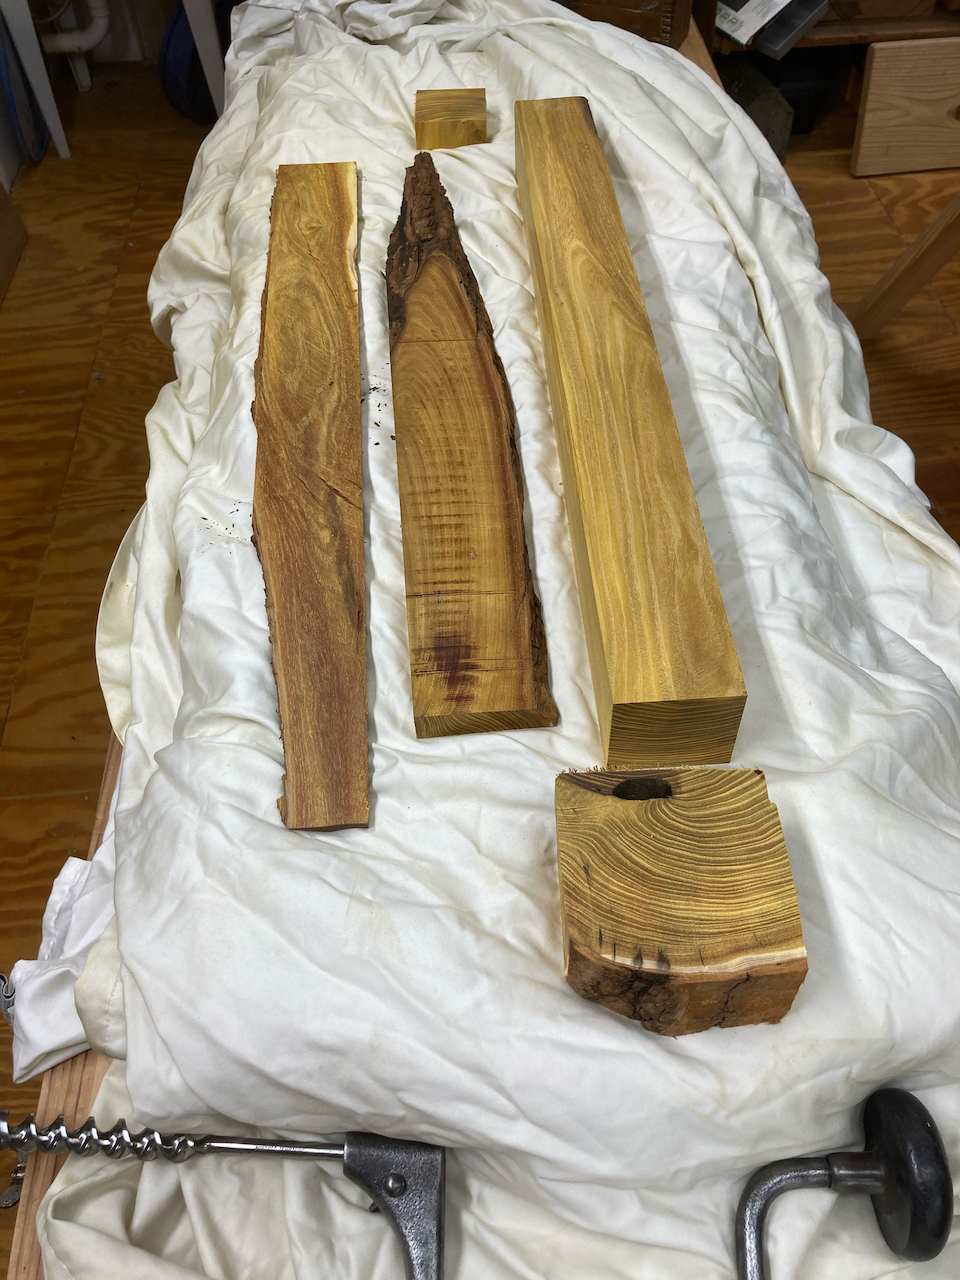
It didn’t take nearly as long to round this third blank. Some of that is due to removing excess material first, but I can also tell I’m getting more proficient at turning on the lathe.
This low bench is turning out to be a great skill builder, including working with leg angles, sharpening reamer blades, drilling with brace and bit, reaming tapered holes, and lathe skills.