Storage Needed
Since I finished the “big build”, I have been catching up on my backlog of sharpening, as well as tuning up some tools I purchased for my adventures in chairmaking. I have an old workbench at the back of the workshop I’ve used as a sharpening station for years. But it lacks good storage, and so I often find things left out with a thick layer of dust on them. I want a way to store my sharpening gear away from the dust but still have it at hand when I need it.
Design Practice Needed
I was listening to (and watching) Shop Talk Live Episode #180 and they were discussing design and the importance of working on design on a regular basis to improve. Needless to say, I haven’t been doing much design while working on the study. I realized with so long working on one project, I need to work on my design skills.
The Fine Woodworking crew also discussed a piece Mike Pekovich made for his workshop that then informed Mike’s design for a piece furniture. So I decided to design and build a cabinet to hold my sharpening gear, but with the idea that the design might evolve into one for a piece of furniture.
Tackling Two Things With One Build
I don’t have much depth between the wall and the shelf of the bench, so I designed a shallow cabinet which mostly fills the available space. I’m constrained by two plumbing drain pipes that run down the wall behind the sharpening bench, but a good sized cabinet can fit between them.
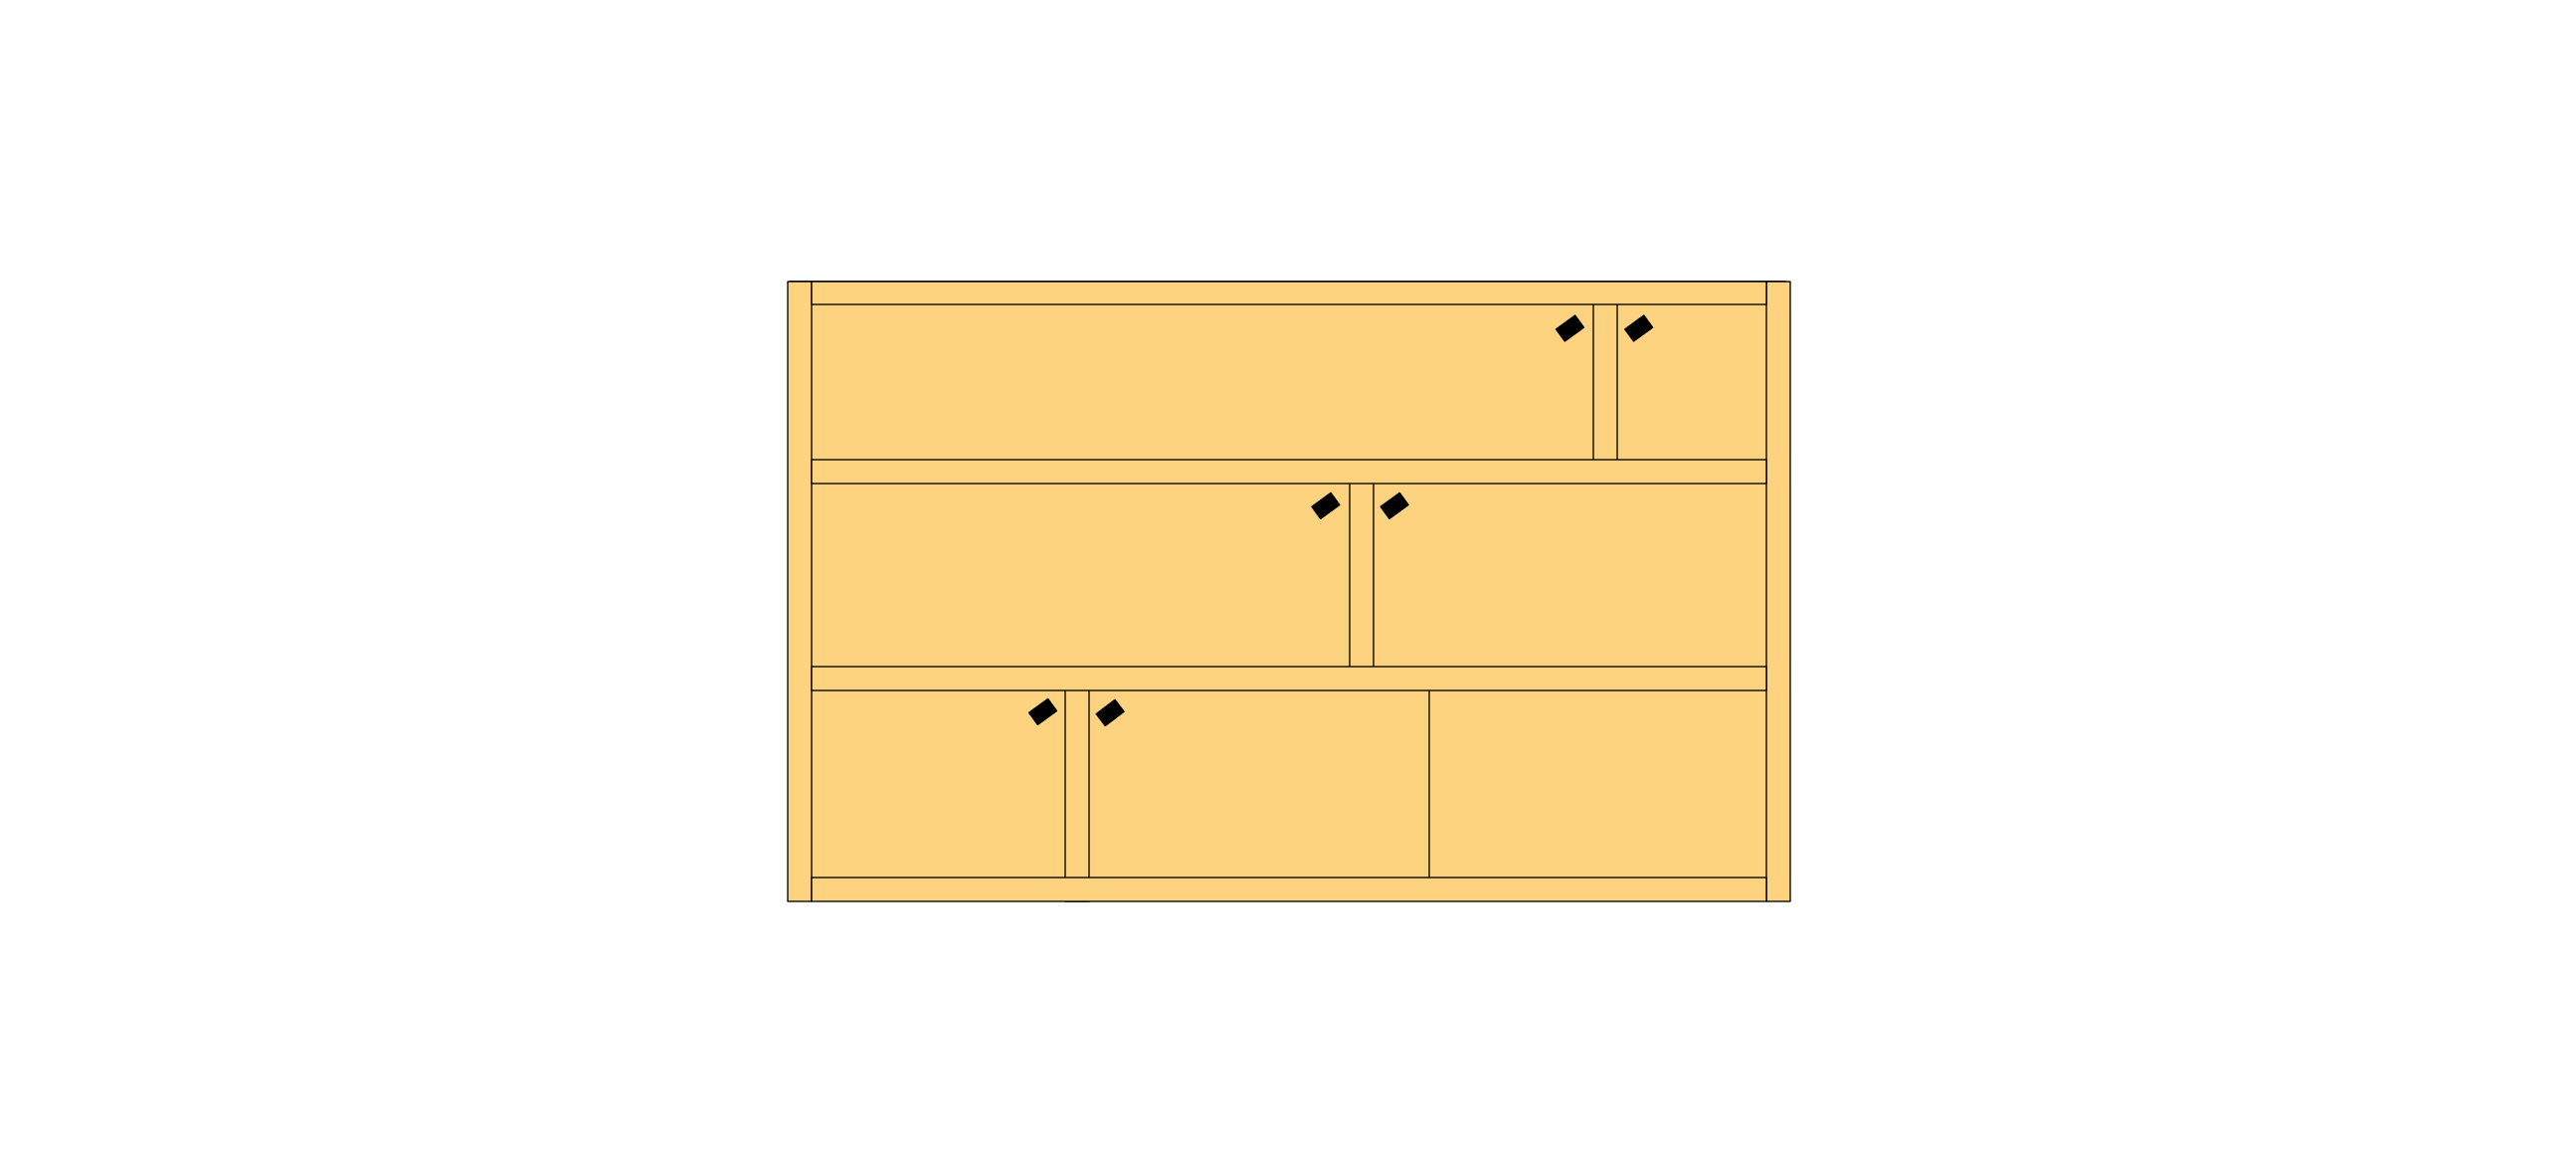
To take advantage of the space, and for a different take on doors, I decided to build the cabinet with doors that slide open to the sides.
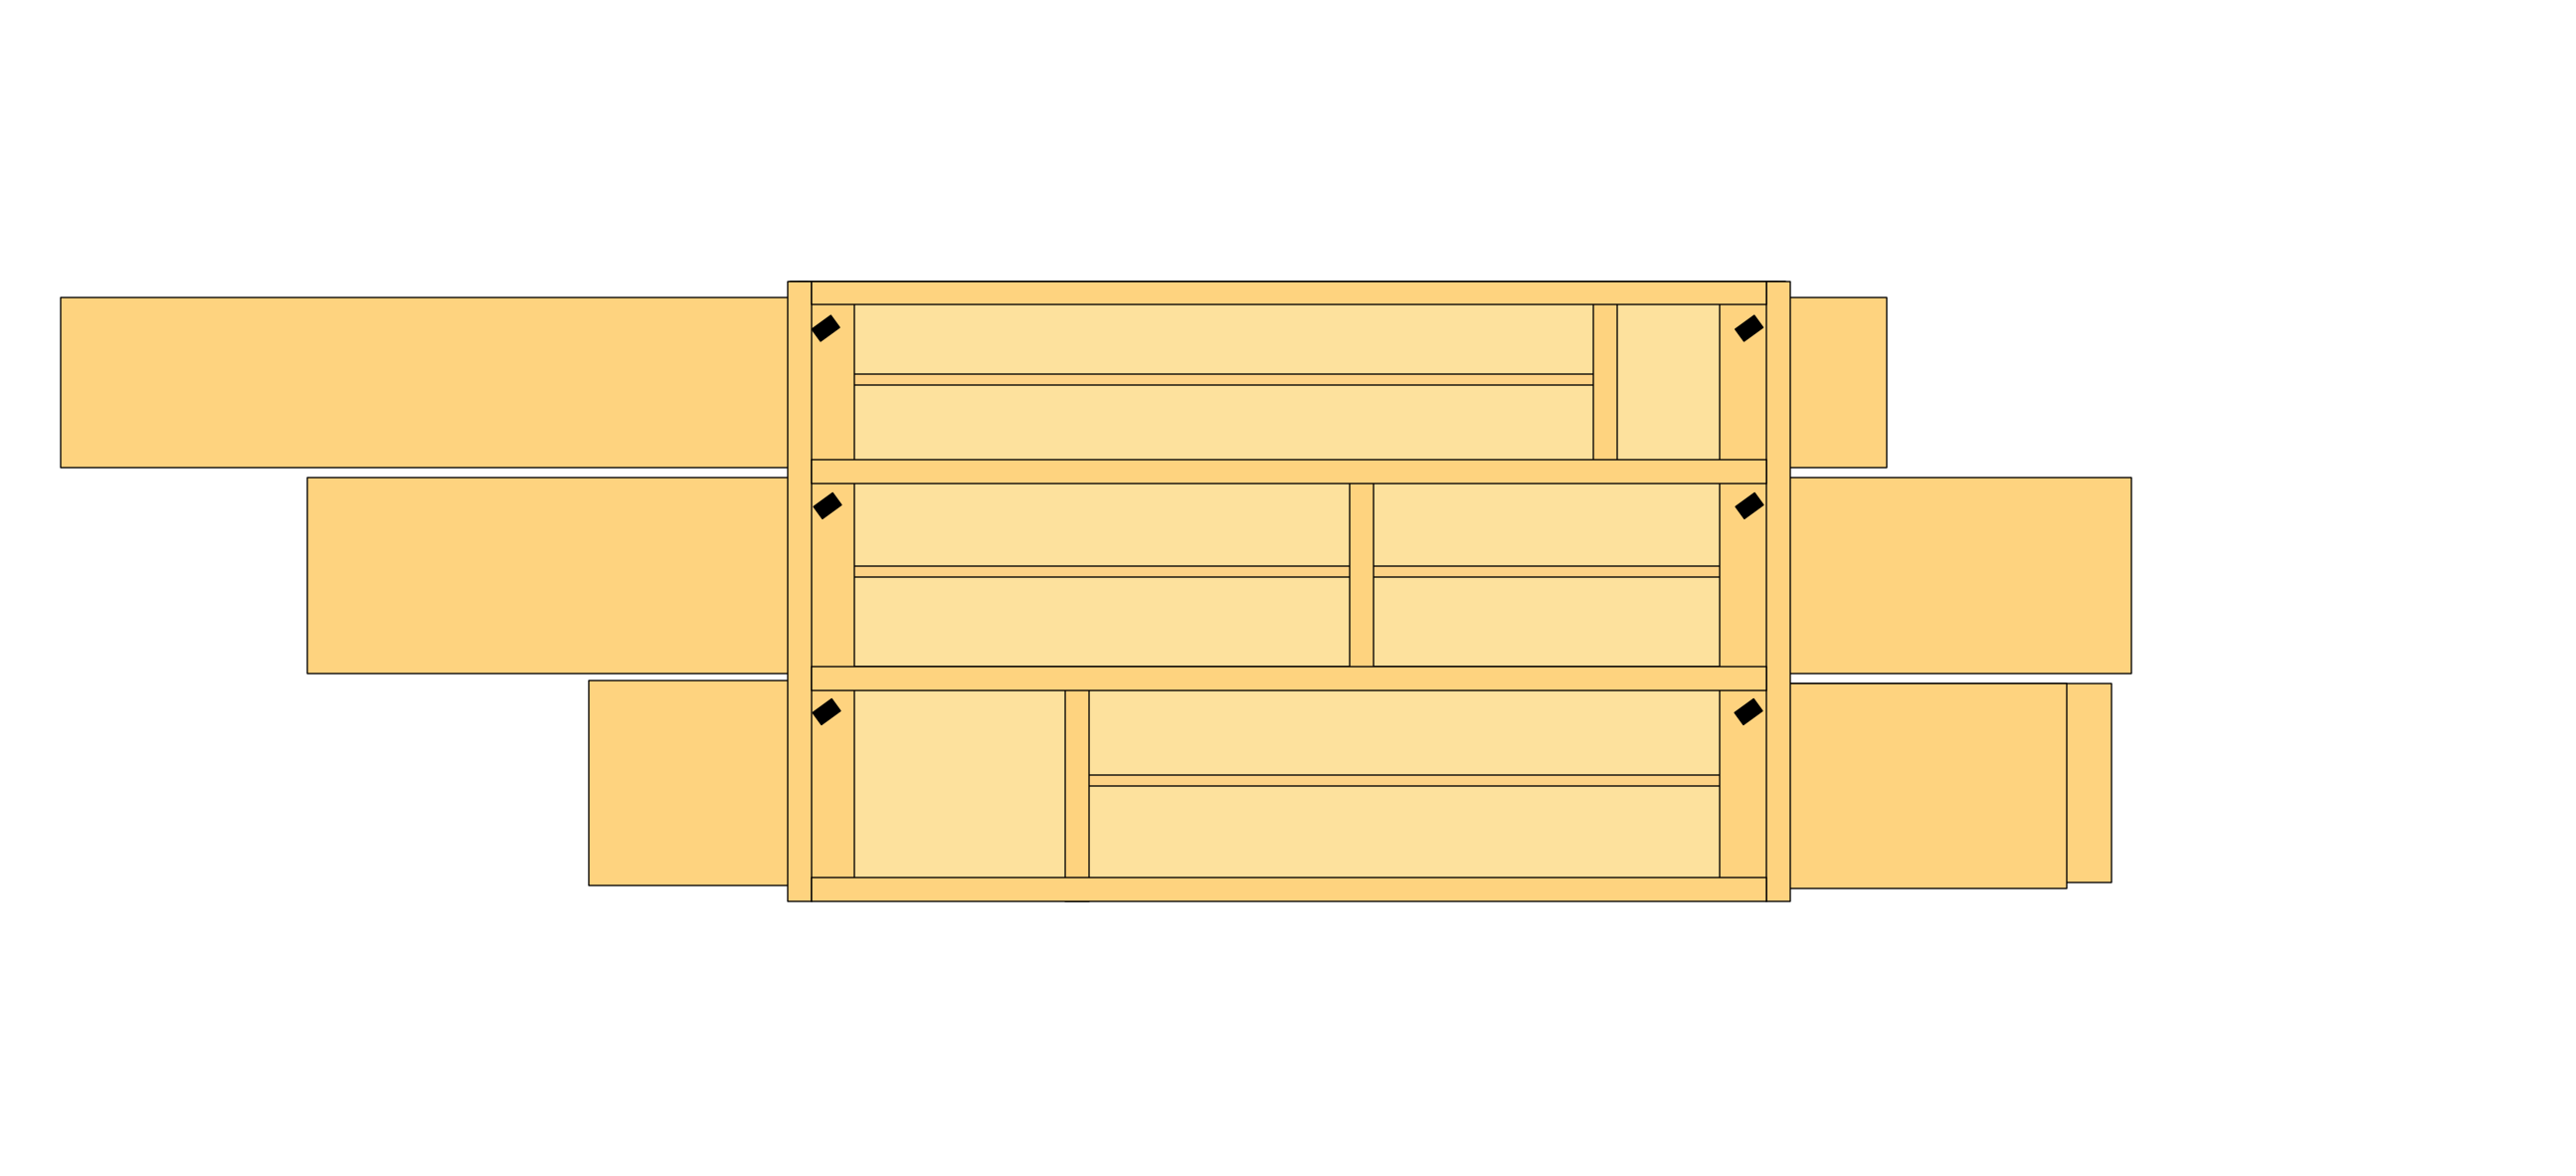
This design also means I can use the shelf on the workbench, which will be just below the cabinet, without knocking over things on the shelf when opening the doors.
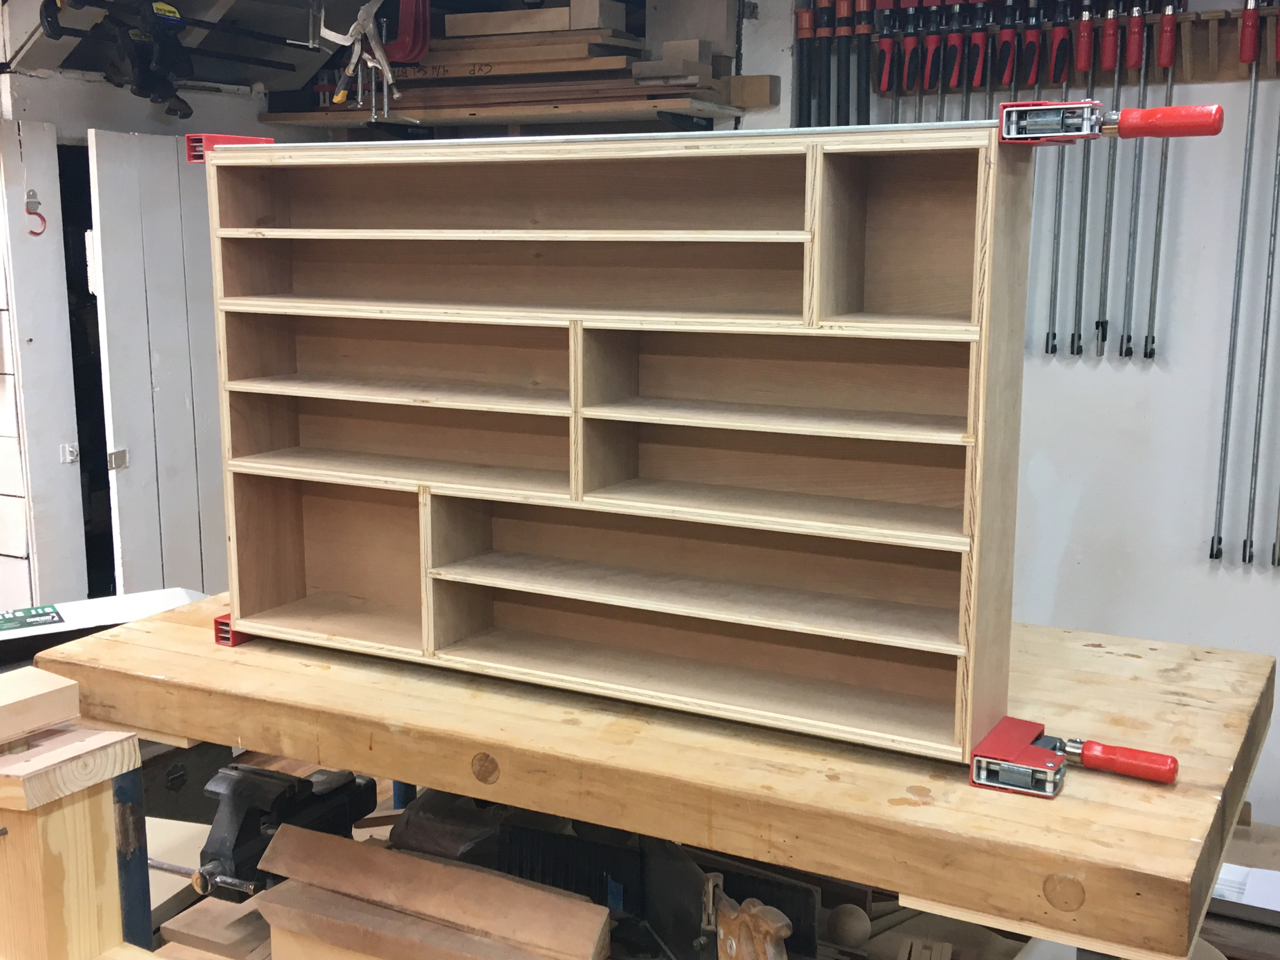
Building the Carcass
After doing my Saturday chores, I went to the workshop and began building the cabinet. While I hope this design may translate into a piece of furniture made of solid wood, I’ve designed this version to use left over materials from the study build. The carcass and doors are cherry veneer plywood, with solid cherry for the face frame and shelf fronts. So construction will be failry simple (no hand cut dovetails here).
The carcass is built from strips of plywood, some 3/4" thick and some 1/2" thick, with a plywood back.

I spent considerable time cutting pieces of plywood to size, cutting rabbets and dados in them, and trimming all the parts to fit. After I had the four sides of the cabinet and the two thicker shelves, I test assembled them.
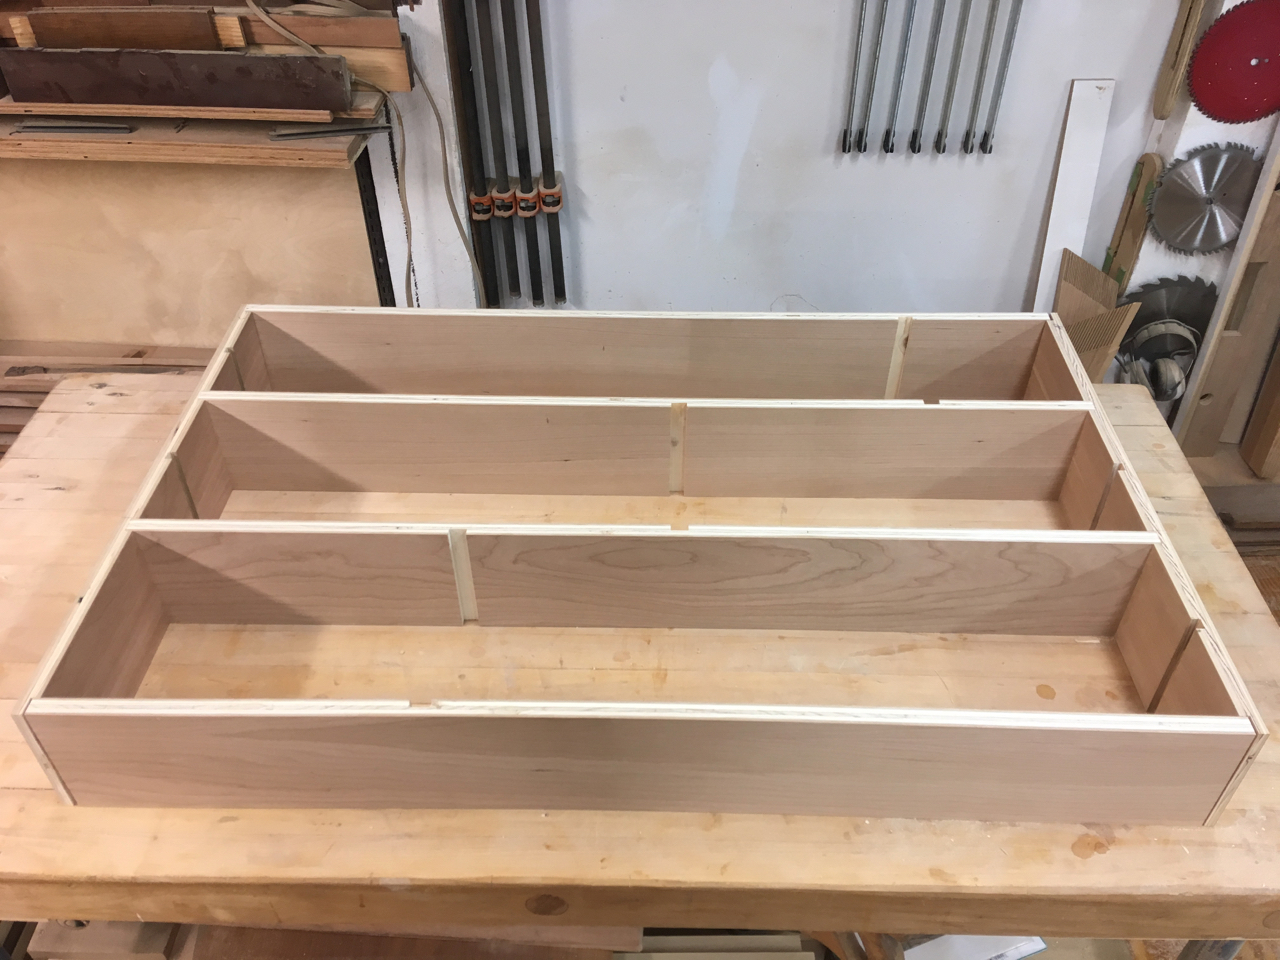
After quite a bit more work, I managed to get the carcass assembled, including attaching the back.
Tomorrow I’ll start on the face frame and doors. I also need to finalize the design for the knobs/pulls.
Window Seat Furnished
On an unrelated note, we received the cushion and pillows we had made for the window seat. We’re quite pleased with the results.